Getting Started
Requirements
- Node.js version >= 14 or above (which can be checked by running node -v).
- Yarn version >= 1.5 (which can be checked by running yarn --version). Yarn is a performant package manager for JavaScript and replaces the npm client. It is not strictly necessary but highly encouraged.
Installation
Install Grit globally onto your machine with npm
npm install -g grit-cli
you now have access to Grit anywhere in the terminal
Basic Usage
The Grit CLI has a variety of commands availiable for running and managing your generators, but additionally there is a full console based UI built on top of these commands. This makes it easy to use grit in its entirety without even glancing at the docs for the commands. All of the Grit features are accessible though both methods so you can run CLI commands directly in the terminal, or you can use the UI to navigate the application visually.
Using generators is super easy. All you have to do is use the run command with the name of the generator, as shown below, and grit will find the generator and run it.
grit run my-generator
When a generator is run, it will begin to prompt you to answer a series of questions. It will then use your answers to cutomize its output and you're done. It's that simple!
Check out the usage docs for details on all of the commands Grit provides.
Jump into Grit
Follow this short guide to see what Grit can do
1. Access the GUI
To access the home screen of the graphical interface, open a new terminal window and run the grit command
grit
This is the home screen. From here you can easily navigate all of the Grit functionality and manage your generators.
2. Install the example generator
Installing generators is super easy. Just use the install command, followed by the name of the generator you want to install.
grit install example
You can also install generators by simply running them even if you havent already installed them. Click here to see all of the different ways you can install generators
3. View installed generators
Now you have the grit-example generator installed on your machine. To view your installed generators, run the grit command again to go to the home screen.
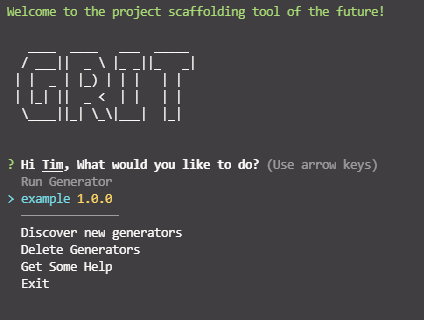
4. Run the example generator
Now that we have the example generator installed on your machine, you see it is availiable to run from the Grit home screen. Press enter when you see example highlisted in the list under "Run Generator".
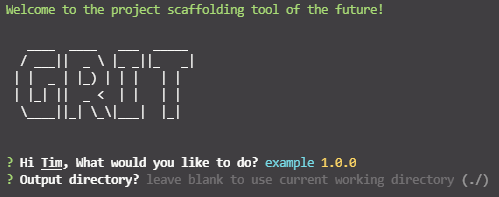
Confirm output directory
Grit now will make sure the generator outputs the files in the correct directory. If you would like to run Grit in the curreny working directory then just press enter here to accept the default outDir, otherwise enter example to tell Grit that you want it to generate into a directory called example.
Answer generator prompts
Now that Grit knows where to generate the files, the actual generator will be run. You will be prompted to answer a series of questions. Answering the prompts will give the generator the information it needs to customize the output.
For this simple example genrator follow along with the steps below.
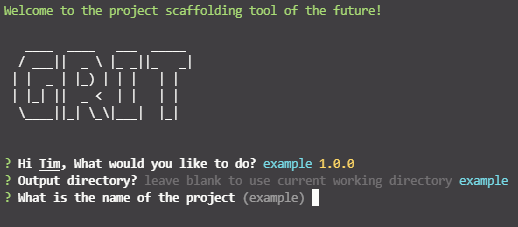
Name
Enter a preferred name for the project output. Notice the example in parentheses. This is a default value that will be used if you dont provide a custom entry.
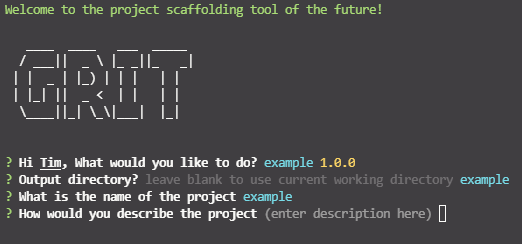
Description
Enter a description for the project output.
Github Username
Enter your github username. You may notice that your Github username is already defaulted here. Don't worry, this is just because the exmple generator is referencing your global git config file to get some of your details.
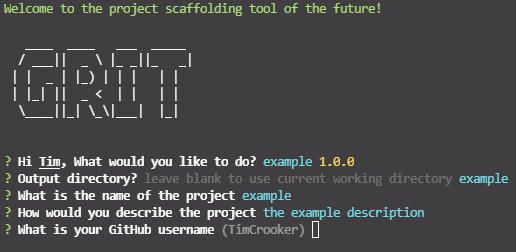
Email
Enter a your email address. The grit-example generator may have also been able to grab this from the git config file.
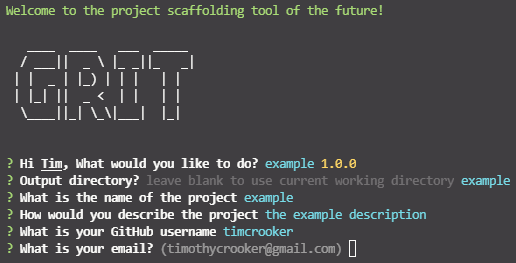
Website
Enter your personal website if you have one. To get the default value of this, the generator is composing the github url with the entered github username.
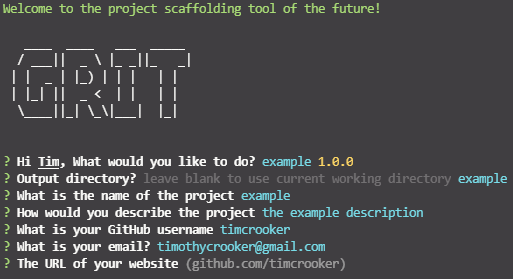
Output
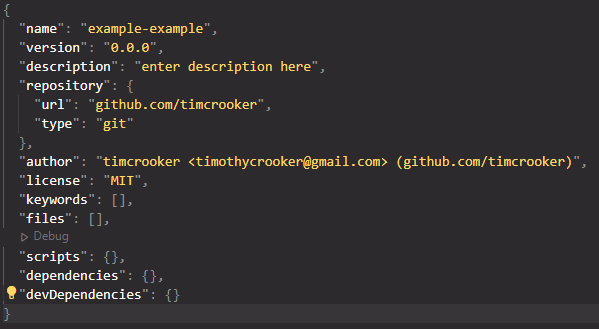
After answering the last prompt the generator will begin to generate the files. Once it shows a success message, you can navigate to the output directory and you should see the files that grit-example generated.
As you can see this example generator is very barebones and simple just to deonstrate the basic operations of Grit.
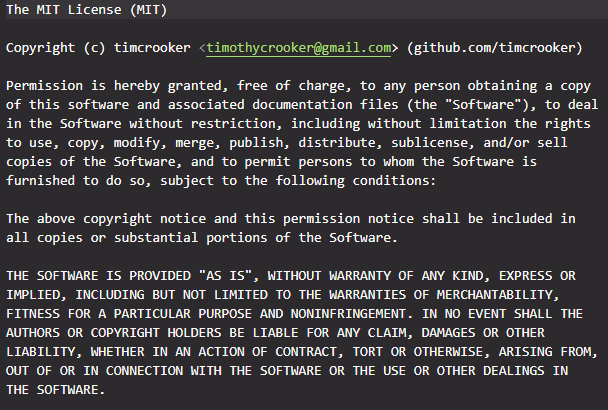
Check out the files and notice that the prompts you answered were actually used as variables in the output of the genrator. This functionality can be orders of magnitude more complex and there are lots of advanced features availiable when creating generators. No matter how complicated a generator may be, it will always be just as simple to use as the example. The only experiential difference would be the number and types of questions asked.
package.json
LICENSE
readme.md
// ENTER README SCREENSHOT HERE